Showing posts with label pretty. Show all posts

Wednesday, April 18, 2012

getting more sewing done...

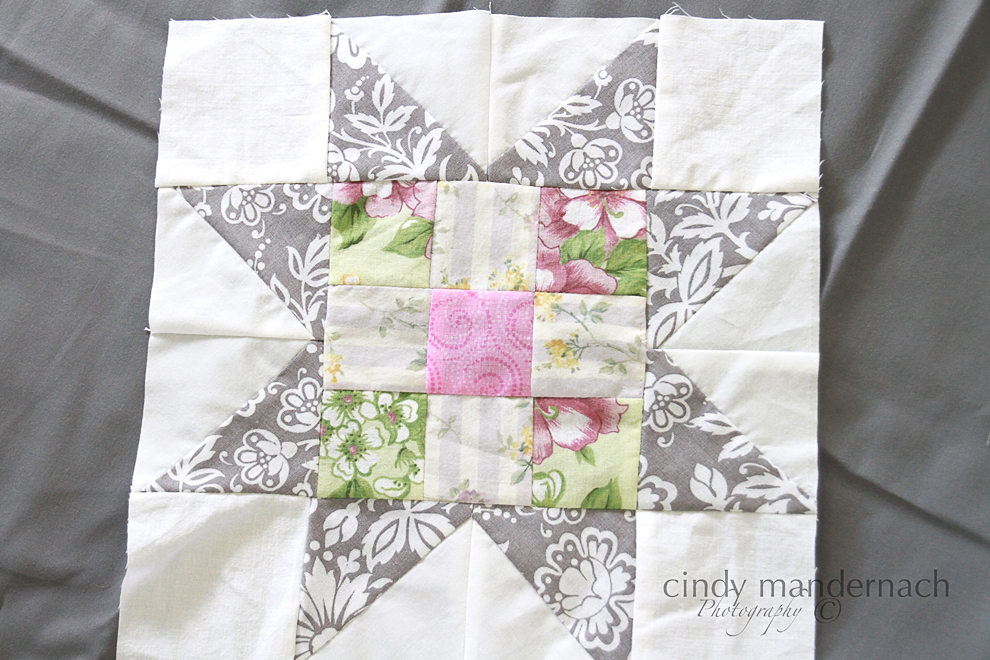
and i am getting way braver...i actually tried to piece a quilt block.
or a whole bunch of quilt blocks....
16 of them to be precise.  

if you are an actual quilter and you are reading this, avert your eyes right now.  
because i am no expert...
but i have to say, i am not completely unimpressed with myself.
i didn't think that I would ever be able to do something like these blocks.
even the thought of doing something like them intimidated me enough to think i could never ever pull it off.  but i have seen so many graphic and colorful quilts on pinterest and i was intrigued by them. but it took months and months to even think of attempting it.  and you know what, it wasn't that hard.  
i should have figured that part of it out just by reading the blogs of people that actually know what they are doing when they quilt.  they make lots and lots of them. and rather quickly too.  so it must not be as tedious as i thought it was.  and i was right.  it really doesn't take that long.  i made 14 of the blocks on saturday and sunday.  the most time consuming thing is cutting the fabric.  the sewing of the fabric actually goes really fast.
i am still working on how i want to put the blocks together.

this quilt was another pinterest inspiration.  all i did was sew pieces of scrap material on top of each other in a block with no rhyme or reason.  if i liked it, i sewed it on top of the last piece. 
the quilt is small, about 26 x 36 inches, so i will probably just hang it on the wall.  it's a little heavy too, because of all of the layers of fabric in each block.

i used lace, crocheted scraps and flannel along with vintage sheets and cotton fabric.
i even used a scrap of super soft fleece.  i just love the houndstooth pattern and it's so soft, i just want to pet it all of the time...
and speaking of graphic, i found a great graphic print at joann's for the backing
the edges of the fabrics were all sewn with raw edges so there are loose strings everywhere....

but i think it adds to the quirkiness of the quilt.
it's very colorful and funky.  
 i am still working on the quilts for chemo and have completed 9 of them.  i have a couple more to make and when lisa comes back to michigan in early may, we will take them to the center.  i gave one to my friend who just started her chemo treatments and she was very happy with her quilt.  she wrote me a beautiful thank you note and said that the quilt was a big hit at the chemo center and everyone commented on it.  i can't wait to deliver these.....
i really love the colors in this quilt.  it's hard to believe that they are all thrifted bedding....
this one is still in the binding stage.
each of the quilts have a tag with an inspirational quote on it.
we wanted to make some more masculine quilts for the men too.  i think that while this one doesn't scream "macho man" it's at least a little less feminine that the others that i've made...
back soon with some pictures from photo shoots that i have done recently....
little teeny tiny babies...  :D


Thursday, January 26, 2012

the fastest quilt top ever.....

well, that is the premise anyway!!  
the jelly roll 1600 quilt is comprised of a bundle of coordinating fabric pre-cut into 2 1/2 inch wide by 44 inch long strips. this is called a jelly roll.  fabric stores sell them and they run anywhere from $35 to $45 dollars.  
but with all of the lovely vintage fabric i have amassed, i cut my own strips.  so that took some time...
and then sewing them together end to end (40 of them) took some time too. 18 inches is cut off of one end.  this assures that there will be a random pattern when they are sewn together.
the resulting strip measured about 2 . 5 inches by 1600 inches.  you then join the short ends, right sides together, which is now 800 inches, and sew along the long end.  that took a really long time because it took forever to join the short ends without any twists.  it was 1600 inches long...
when you get to the fold, you cut it and join the two short ends up again 
which makes it 400 inches long. 
 this is repeated three (or four, i don't remember) more times until you are left 
with this....a cool quilt top that measures about 48 x 64 inches...
once the first side was sewn, it went pretty fast from there, about an hour and a half...
the only thing left to do is to add the batting and backing and quilt it....
                    this is the result....

 another pretty vintage sheet quilt.   now i know that most (all) of my quilts  have been some sort of strip quilt but they are the ones that go together the quickest.  i am going to attempt something different next time though.  stay tuned!!  :)

Wednesday, September 7, 2011

I've been keeping very busy lately....

i've been doing a lot of photography shoots and processing really takes a lot of my time.  that is why i have been so lame about blogging.....heck, i haven't even been reading blogs for the past couple of weeks.

i love the processing of the photos part of photography.  i get to look at these faces for hours...
i can see their personalities in their faces.....
 big sister sophie, older than her years, who takes such good care of the sisters 
who obviously look up to her...
the serene middle child sadie, who chills while the older and younger sisters run the show.....
 and the sassy baby sister sydney, who isn't going to get lost in the crowd.....
their mama is the most beautiful woman ever, and her house is to die for......
i may have to go back over there sometime and get pictures of the inside to share with you.....

and daddy, the lone y in the forest of x chromosomes, and who totally dotes on all of his girls.
the cutest family ever.   
 i had to spend extra time processing these photos because we were swarmed by mosquitos the entire shoot, even though we were drenched in bug spray, and i had to clone out the welts from their skin.
 totally worth it though.....
we all had so much fun.....
christina and steve...your girls are growing up beautifully!!!!
thank you for letting me document the transformation....

Sunday, March 13, 2011

necessity is the mother of invention......

so is being on a very tight budget....
i plan to take a lot of pictures when austen and i go to washington dc.  i have a lot of camera equipment and it goes in a big backpack camera bag.  it's heavy and it screams "camera equipment in here, steal me".
i wanted something that was lighter, cuter and more purse-like.  so i searched the internet and found 
this epiphanie bag.
oh, so pretty isn't it?
however.....
$184.99...no thank you!
i saw the price and pictured myself with the backpack strapped to my back for 15 hours a day. and then someone stealing it from me.....
  i googled "camera purse" and found a couple very creative diy-ers who made their own camera bags. 
so i got creative.
10 minutes later i was out the door for my supplies....
i went to kohl's and found 
this
very fun purse..silver genuine faux giraffe skin....
on sale from $44.00 to $26.40 and with an additional 30% off coupon i had, the total cost was $18.48.
yes, please!!
then i went to joann's and picked up 
these supplies....1 inch craft foam, $6.99, fat quarter fabric, $1.39 each and batting, $7.50.  i also picked up some iron-on velcro for $5.50. i ended up only using the craft foam and the velcro.  total? 13.00.
turns out i needed more fabric for the project so i used fabric that i already had.
i measured the purse, cut the foam and sewed the fabric into little pockets for the foam.  i ironed on the velcro and had i known that i was going to be using the fabric that i did, i would have picked up white velcro instead of the black.  oh, well!!
i made side panels, slipped the padding into the purse and
used a breadcrumb container for a camera model.  i was making meatballs at the time
and was too lazy busy to get my other camera out.
and because i am lazy, tired, ingenious, instead of making the separator panels to make the compartments, i am using the ones that are in my backpack.  
total price of this project? 
$31.48.  
total savings?
$153.51.
mo' money to spend in dc...oh, yeah!!
and there is still plenty of room for another lens, my little wallet, digital cards, cell phone and a notepad and pen. and if i want to use it as a purse, the innards just slide out.
cool, huh?

Monday, February 7, 2011

laundry room redo....

(scroll down to see 14 days of valentine)
i started with a dark laundry room.
 it worked at the time because the rest of the house was painted in similar tones
 
i knew i wanted something lighter and brighter.
i didn't get a picture of the light fixture but can you say "builder's grade crap???" that, paired with the dark paint on the walls really made it depressing to do laundry.
and i like to do laundry.
sooooo, i knew needed to do this on the cheap or hubby was going to have a cow...
i had a gallon of oops paint ($5.00, yup, five dollars) that was a very light cream.  i knew i wanted a nice aqua/turquoise theme.
since home depot does not re-tint oops paint, i had to get creative.  i bought a tester paint in the darkest turquoise i could have tinted and mixed it myself.  it was a really green turquoise so i added some dark blue craft paint that i already had in the house, mixed it in and got the tone i wanted but it was still too dark.  so i foraged around in the basement and i found a can of white paint
and added some of that to lighten and brighten it up. 
it took a lot of mixing and trying out on the wall, but i finally had the right recipe for the paint.
 i had don move a light fixture from another room to the laundry,
 isn't she pretty?  much brighter than the old builders grade crap.  
 i took some pictures of the blue mason jars that i love, printed them off and made some artwork for the room. 
 i framed them in a frame that i painted a while back but never used...
 i added a shelf that i had in the basement (free, score!) to hold some pretty accessories. 
 i decided to add a board and batten ($20.00 for the wood) effect to the garage wall so i could hang hooks for keys, bags and purses.  i followed kate's instructions here at censational girl and couldn't believe how easy it really was. masking tape helped hold the boards in place while i measured the spacing of the boards. 
i found hooks at hobby lobby and spray painted them with an oil rubbed bronze finish for some contrast. 
 there is a bulletin board on the opposite wall. i'm not sure what i'm going to do with that yet, the wall just needed something...
sigh, i love it....
nice and fresh and clean....
and it makes doing laundry so much nicer.

i added the faux roman shade that i made....
i really love how it turned out,

but the reality of the room is that it is a pass through from the garage into the house to the kitchen.  it is a very small room, about 8' x 6' so there isn't really room to have a proper mud room. 
 it has to serve duty as a coat closet,   
a place for a laundry hamper
a home for my purse and keys and shoe/boot storage...
and because we enter from the garage, i really can't put a pretty/light colored rug in here, so the old one will have to stay.
so my pretty room has to do triple duty.
but it is so much better to be in than it was before.

edited to add: the tutorial for the faux fixed roman shade from kate at centsational girl is 
here.

instead of attaching the non-working shade directly to the wall as she did, i screwed tiny i-screws into the top and hung the shade from cup hooks screwed into the ceiling.
the light fixture from lowes
here 
was spray painted with heirloom white paint.  the glass bowl of the fixture was an icky yellow color. while i was washing the bowl,  i noticed that the yellow was peeling off.  i used a steel wool pad to remove the yellow coloring which just seemed to be some kind of coating. 
unfortunately, i was like a mad scientist in the lab with how i mixed up the paint using what i had on hand, and i will go to home depot in the next few days to see if i can color match with what they have.  

****2/17/11****
okay, so here is the scoop on the paint color......i went to home depot and had them color match the paint splashed paper covering of the paint can with their computer.  this is what the computer printed out...
 i then went over to the paint cards and this is the closest that i could com to the color.  the raggedy little piece of paper is the actual paint from the paint can label.  because i used behr paint, the computer sticker is just based on behr paint.  
the paint guy told me that the formula would be different for different brands of paint.  


if anyone is interested, i can go back and have them color match with the computer for the martha stewart or glidden paint as well.  
the americana craft pain in spa blue (DA277) was a pretty close match too, however, when i looked it up on the website, the color was nowhere near what it looked like in real life.  i got the americana craft paint at hobby lobby. 


*****roman shade fabric update*****
i went back to jo-ann fabrics to see if i could find out any information regarding the fabric.  
unfortunately, there was no identifying information on the fabric itself.  
the cardboard that the fabric was wrapped in stated that it was 
vff outdoor fabric with a sku # of 961-7317.  it was $6.00 a yard but this was a clearance price.
****sorry, there was no other information****


total cost of the redo?
less than $50.00, and that includes paint, wood for the board and batten, fabric for the roman shade and hooks for the wall.  everything else was repurposed, material on hand and decor that i shopped for in other rooms in the house.
and
i did it all myself (other than don helping with the nail gun, which i'm ashamed to say, scared the crap out of me) and helping hold the shelf while i screwed the brackets into place.
i think i did alright.....

linking up at thrifty decor chick


Related Posts with Thumbnails