Wednesday, December 28, 2011

the laundry room revisited....

i think that this room has to be the one i am most proud of in my little diy portfolio.....
the before: 
yuk!!! 
(and i am the one who painted it like that in the first place....
i can't even blame it on the previous owners of the home because we bought it new).

i had ideas for the room swirling around in my brain for a long time.  i just wanted light and bright...i considered painting the room white.  that was a fleeting thought...what would my family and friends say....the girl with the easter egg house.....(so named because of the bright colors we painted when when we first moved into the house).  then i fell in love with turquoise.  hard.  i am sure that the inspiration for the paint came from the blue mason jars i love so much.
so i mixed the color myself from a can of  $5.00 oops paint.
when i started redoing the room, more ideas kept popping into my head and i just went with them.  

a chandelier in the laundry room???  who does that? 
i do..
(look at that bling bling)
tiffany blue walls in the laundry room??? who does that?
i do...
mason jars styled, photographed as art and framed?? who does that?
i do....
board and batten treatment in the laundry room??  who does that?
well, i saw lots of people who had done that in their houses so i figured i could do that too, so, 
i did....
and i did it all by myself...
well........almost.
don hung the chandelier 
because ever since i stuck a butter knife into a lamp socket when i was about 9 years old,  
i am afraid of electricity...
even if the power is off.  
and he helped me use the nail gun for the board and batten ledge 
because that thing is scary, 
especially when it blew the air into my face when i pulled the trigger.....
it scared the bejeebers outta me....

 i am, however, very proud of the fact that 95% of the work was done by yours truly.....
the planning, the painting, the woodwork and the decor....
 i love the room.  everyone that has come over to the house loves the room.  
it makes you want to do the laundry.
sigh......
there have been a few changes in the room since it was first transformed.  
most have been cosmetic changes, changing out the decor and adding other girly touches...
glass containers to hold detergent and oxyclean....
a wire basket to hold towels

and more of my favorite blue mason jars.
i made a little cover from a vintage sheet for the shoe storage cube. 
    the picnic basket holds gloves, scarves and hats for winter. 
i had an old half circle table cloth with lace trim that i added to the roman shade.
my friend lisa's parents have an old barn where i found this window.  the glass was so dirty that i thought it was opaque....when i washed it i realized that the glass was perfect.  the paint is original.  it was turquoise.  i didn't have to do anything to this window to get it to look like it does.  
the patina and rust on this frame is gorgeous and they let me take the window for free....
(thanks walt and penny)  
the one thing that i don't like rust and patina on is my washing machine.  
especially one that is only about 9 years old.  
of course, don tried to fix it. using caulk . which as you can see didn't work very well.
that lovely orange below??  rust!!  
i know that 9 years is a long time for appliances nowadays but it drives me crazy that the lid of my washer rusted.  
so i am entering a contest to win PartSelect’s $5000 GE Giveaway contest for new appliances
because a new washer and dryer would be the icing on the cake in this beautiful laundry room!
and
because my dishwasher is on it's last leg.....
i am keeping my fingers crossed to win. someone has to win, right?  why not me??

wish me luck!!!!


Sunday, December 25, 2011

merry christmas.....

from our family to your family.....
wishing you the most beautiful christmas holiday and
joy and prosperity for the coming year.....

MERRY CHRISTMAS 
from the mandernach's

Monday, December 19, 2011

the kitchen floor...finally....

the kitchen floor was a long time coming....we lived with builders grade vinyl flooring in our kitchen for 9 years.  it was ugly, stained and gouged.  when we bought our home it was a new build spec house.  it was done except for the flooring and countertops. so we got to pick those.  that was way before i had any design sense blogs and pinterest were around.  i wanted to extend the wood flooring that was in our hallway (which you can see beyond the dark floor)
 into the kitchen but the builder told us the cost of doing that would be $3300.00.
what???  uh, no thank you...
so we went with the cheap vinyl flooring.  it was fine in the beginning but it went bad fast.
when i just couldn't stand looking at it one minute longer, we decided to redo the floor.
the timing sucked though, because don had lost his job a few months before and we really could not afford to put wood flooring in.  i stumbled upon a blog where someone had redone their floor using a wood grain peel and stick vinyl plank that was 4 x 36 inches.  it looked great and it was really inexpensive.  i researched it and read reviews from people who used it.  they had it at lowe's, and at a dollar a plank, it was something that we could afford to do,
if at least as a bandage until we got real wood flooring.
we installed it
we were impressed with it
and it looked great.
for about 6 months.
then it looked horrible.
it shifted and separated at one end and overlapped at the other.

despite what we had read about this product, and all of the reviews, our kitchen looked like crap.
and it scuffed something awful.
i know it was inexpensive, but c'mon, really?
we contacted the company by email and i sent these pictures to them.  thankfully, we had kept our
receipt, we sent a copy to them and they refunded our money.  with no questions asked...hmmmm, i wonder how many times they had to refund homeowners money!
we took that money put it toward the wood flooring i waited 11 years for.
  lumber liquidators cocoa birch hardwood
don started ripping up the old flooring and what a bear that was....we had installed the vinyl plank flooring directly over the original vinyl flooring so we had to take up two layers.  the original builders grade flooring was really glued down.... wow!
it took the better part of a week to get it all up but it was finally done.
my brother-in-law came over and helped get us started on the new flooring and show us how to use the nailer thingy with the hammer...
which scared the dickens out of me at first but made the flooring go in really fast.
we did have a problem with the nailer because if it wasn't lined up just right on the board,
it would chip it.
fortunately, i was able to sand (because they were slivery) and stain these little marks and you could not tell the difference.

they finally let me try the nailer and i finished the floor at the doorwall when don was at work.

here is how it started out last year...
i loved it at the time but...
i was really ready to lighten it up....
and here is how it looks now....

i think it looks great.
finally!!!
i finished painting the bottom cabinets the day before we started installing the floor.
i think they look great too....
the color is more like the above picture than the one below....

the rubber band on the door is because my dog thinks that the trash can in there is a snack bar....
i found some cup pulls for the drawers that have a victorian feel to them.  now i just need to find knobs to match....
sorry about the white balance differences.....said the photographer  :D
i finally got the trim up on the top cabinets. i dry brushed them with cream paint because i had sprayed them with a darker paint than the lower cabinet paint and i was too tired, lazy, busy to repaint them.
(i fixed the discrepancy above, though)
 i am very happy with the floor.
except.....
it is really dark. which means that it shows every speck of dust and dirt.
but hey, it is the cleanest floor around because i am constantly dusting, vacuuming or washing it.
and it looks beautiful....
finally!!


Friday, December 9, 2011

a bit of vintage....

Yes, i am still here.....and i am sorry i haven't posted for so long.  the truth is, i just haven't been motivated lately.  i don't know if it is the impending christmas season, the change from fall to winter, all of the photoshoots i have been doing lately or a combination of all of these.  probably the latter. 
 i am going to make it a priority to post regularly, though.  if only to challenge myself....

so.  one of the things that has been taking some of my blog time inspiration??  i have been collecting vintage sheets.  that darn pinterest has inspired me once again.....
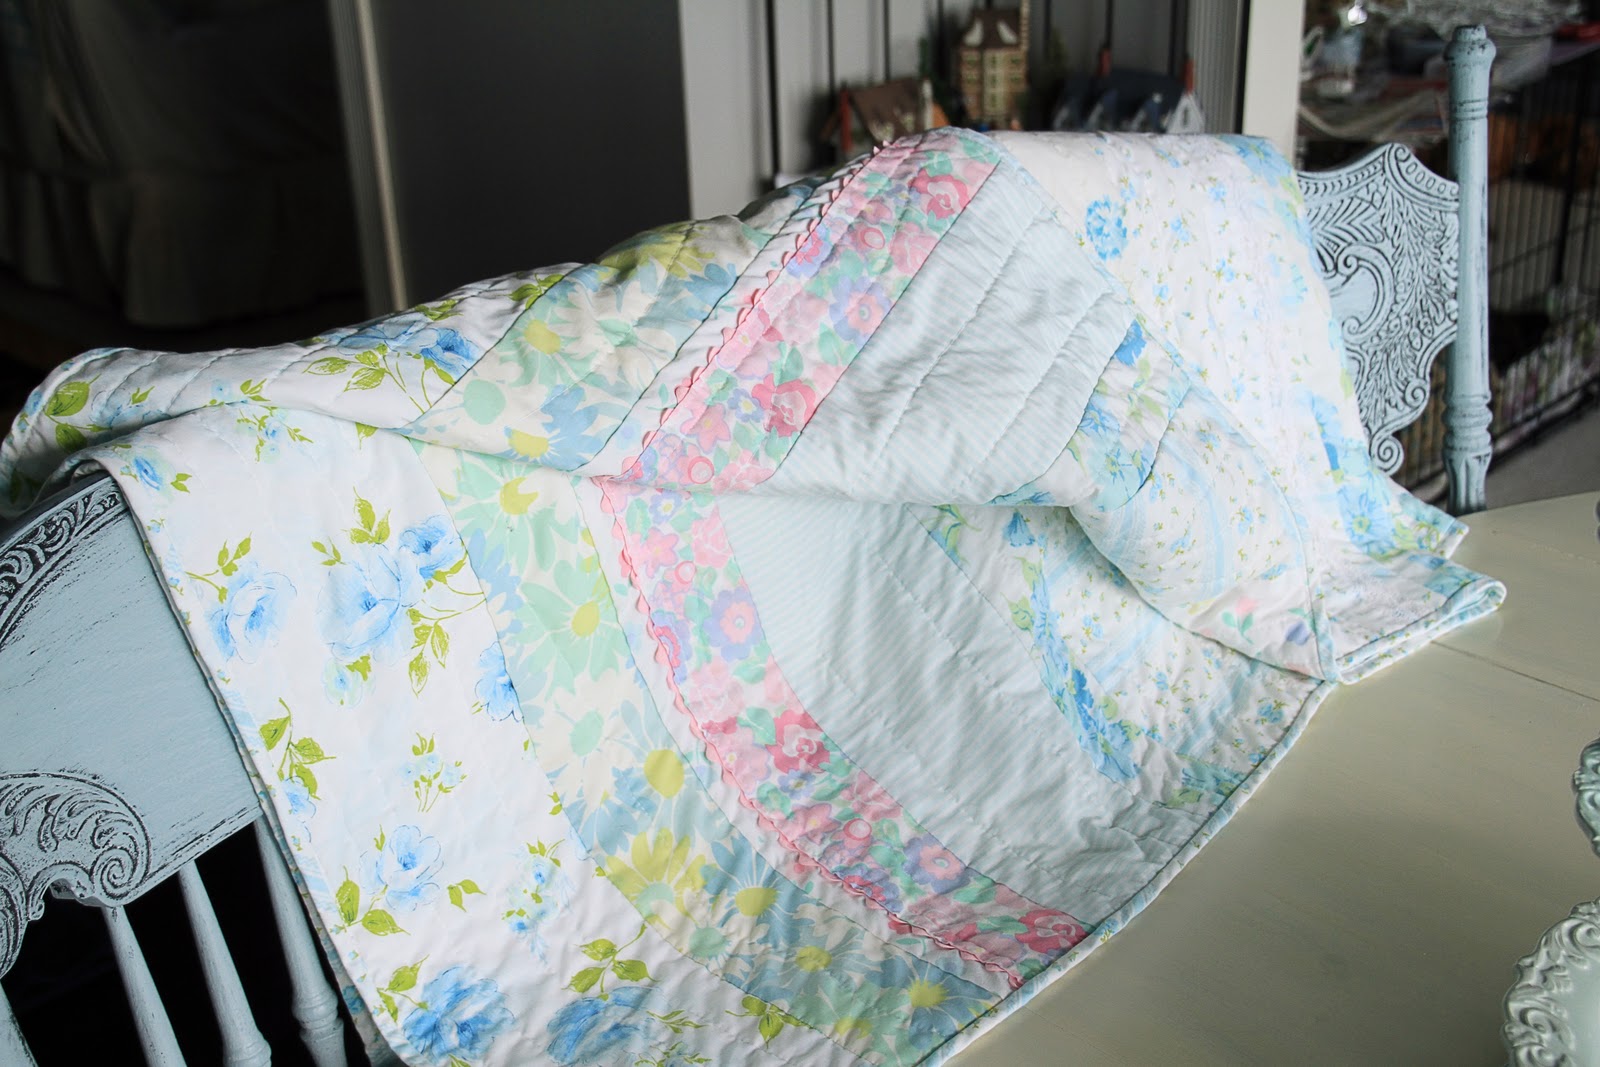
i tried my hand at quilt making.....
a huge undertaking for someone like me. 
let me start by saying that i am no seamstress.  to be honest, i don't even like to sew and i suck at it. it reminds me of 8th grade home ec class when i had to sew culottes (yes, culottes) from a pattern.  i brought them home the day before they were due and they were a hot mess....my mom, bless her heart, and i spent the entire night redoing them and i ended up with an A on the project. (thanks mom)!  i have had an aversion to such detailed sewing since....
  but i have to admit, this was fun.  and it was easy....
 the goodwill and salvation army have been a treasure trove vintage sheets and pillowcases.
i know, it sounds gross and disgusting and i thought so too until i started seeing these beauties all over pinterest.  
 there was just something about the soft colors, the well worn and faded textures
 and to be sure, the nostalgia associated with seeing a sheet that i had as a child.  see the turquoise flower and stripe (top right) below?  i had sheets just like that when i was a teenager...
now, the thought of cutting and piecing little squares daunted me but i found instructions for a strip quilt.
sewing the fabric, batting and back all at the same time?  in long strips instead of little squares?  
sign me up!!...
it literally took me about 5 hours to complete.  most of that time was spent deciding which sheets to use and cutting the strips.  the actual quilting consisted of sewing straight lines and some curvy ones to hide my mistakes on the back just for interest.  
it is just a lap quilt and is 50 x 72.  i used twin and double sheets as well as a few pillowcases for it...some of the strips are actually the decorative tops of flat sheets,
a lot of them are trimmed in lace or other fabrics and added color and textural interest.  you can sort of see the lace trim above and below.  the pink strip was also a sheet top.....
  the backing is a full sized sheet... the salvation army had the top and bottom sheet as a set for $6.99 which was way more than i would spend but it was half off that day.  where can you buy probably 7 or more yards of fabric for $3.50?   the batting for this quilt was $14.99 for 72 x 90 which was on clearance at hobby lobby.  the vintage sheets (i used 5) and pillowcases (i used 3)  ranged in price from .99 for a set of pillowcases to between .75 and $4.00 for the sheets.  i probably used about 1/4 of each sheet that i used and just the folded edges of the pillowcases, so my best estimate is under $20 for the quilt.
it is a nice lightweight quilt, perfect for snuggling up under in the winter and light enough to use in the summer air conditioning...
i have tons more vintage sheets


and i think they will make beautiful quilts.....
Related Posts with Thumbnails