Thursday, January 26, 2012

the fastest quilt top ever.....

well, that is the premise anyway!!  
the jelly roll 1600 quilt is comprised of a bundle of coordinating fabric pre-cut into 2 1/2 inch wide by 44 inch long strips. this is called a jelly roll.  fabric stores sell them and they run anywhere from $35 to $45 dollars.  
but with all of the lovely vintage fabric i have amassed, i cut my own strips.  so that took some time...
and then sewing them together end to end (40 of them) took some time too. 18 inches is cut off of one end.  this assures that there will be a random pattern when they are sewn together.
the resulting strip measured about 2 . 5 inches by 1600 inches.  you then join the short ends, right sides together, which is now 800 inches, and sew along the long end.  that took a really long time because it took forever to join the short ends without any twists.  it was 1600 inches long...
when you get to the fold, you cut it and join the two short ends up again 
which makes it 400 inches long. 
 this is repeated three (or four, i don't remember) more times until you are left 
with this....a cool quilt top that measures about 48 x 64 inches...
once the first side was sewn, it went pretty fast from there, about an hour and a half...
the only thing left to do is to add the batting and backing and quilt it....
                    this is the result....

 another pretty vintage sheet quilt.   now i know that most (all) of my quilts  have been some sort of strip quilt but they are the ones that go together the quickest.  i am going to attempt something different next time though.  stay tuned!!  :)

Tuesday, January 24, 2012

adding in even more projects...

i haven't had enough to do lately, so i thought i would take on another project.  i woke up on saturday, walked into my powder room and decided that i was sick of the black cabinet in there and took the doors off.
i figured if i started dismantling it, i would have to finish it.  it is getting a new paint job.
that lovely brass toilet paper holder got a little facelift too!

 i figured that if i was going to take on this task on the spur of the moment, it was going to have to be simple and quick.  so i broke out the chalk paint and started painting.
 i used paris grey
 and then realized that the walls are grey too....
 so.  i have another design in mind for this room.  the most changed out room in our house in the almost 12 years that we have lived here... if i am remembering correctly, this would be the sixth design change in this room.  (crickets)

fickle much??
anyway, with the walls being grey and the cabinet being grey, i distressed them a little and left them with a rather rough finish.  i love the contrast between the rough texture and the cute new knobs.  
the toilet paper holder was sprayed with a dark bronze metallic and it instantly updated it.  
bye-bye brass...hello, modern!!
i also painted the inside of the cabinet doors just for fun.  because bathrooms should be fun, right?
and my homage to harry potter...the lumos/nox light switch.  they are just scrapbooking stickers but it is a fun touch.  i have done this on a few other switch plates around the house...(and i know that the switches are really grungy and dirty but i am not sure how to clean them....a q-tip didn't fit under there and i am afraid to spray any cleaner into that area.  
you know, electrocution and all!  :)
(so if anyone knows how to clean the on/off switches, please let me know)!!
so...
my plan to finish this room off is to replace the flooring with a vintage looking tile, a board and batten treatment for the walls and paintable embossed wallpaper in a vintagy tin ceiling style for the ceiling.  i have never wallpapered a ceiling but the room is very small so i think it is doable....  
i may try a little stenciling on the walls too.  

i did finish one project that i have been working on.  this quilt was made for a very dear friend who is expecting a baby girl.  her baby shower was on sunday. 
this is the first one that i made using store bought fabrics instead of vintage sheets, although i did use one for the back of the quilt.  since it is for a baby, and babies are tactile, i wanted to incorporate as many textures as i could.
 i used linen and lace,
 flannel and fur
 and corduroy that feels like velvet....it was so soft...
i also made some coordinating burp cloths for her but neglected to take pictures of them.  
the picture below is the only one i have of them...but they were really cute....
 i loved this quilt...and so did she!
i started a part time job working a couple hours a day for a few weeks in the front office of an elementary school.  i love working with the kids and the people that work with me are great.  it is a really fun job and hopefully it will become a permanent part time job.  
i will be sharing a couple more projects that are almost finished in the next few days.... 


Thursday, January 12, 2012

a curvy beauty.....

i can't believe that this is my first post for 2012....someone has not been sorting out her priorities....
ahem,.....
i have had my hand in about 5 different projects at once.
i rock at the multi-tasking....
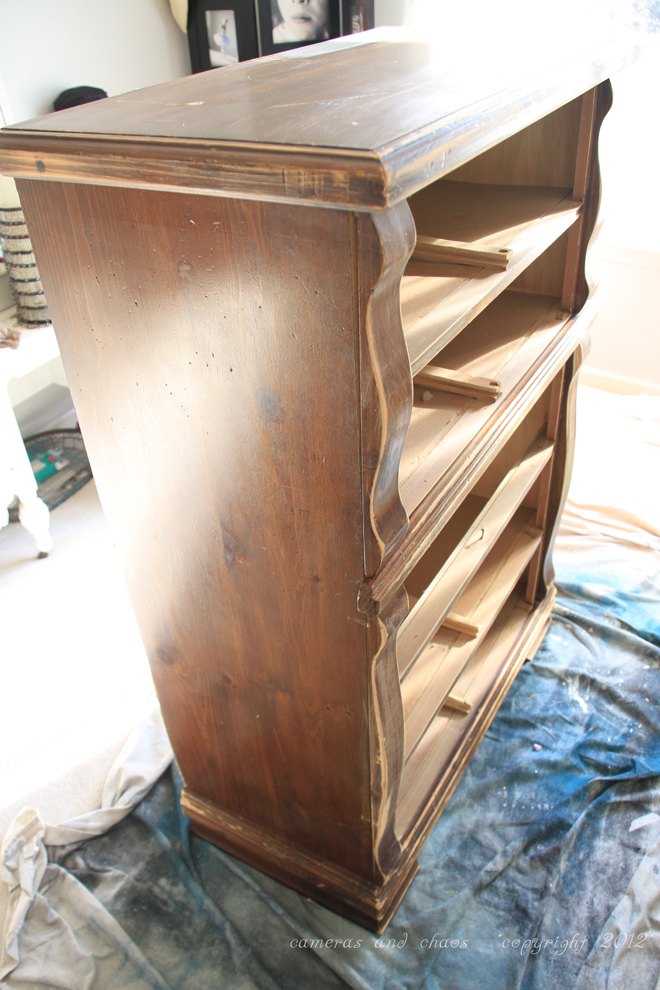
i have been redoing this dresser 
and want to use it to store my stash of vintage sheets and 
finished quilts. 


i picked this out of someone's trash last spring.  it was in pretty bad shape and all of the drawers were destroyed.  but the frame is in good shape.  the shelves (drawer bottom bases) in there are just made of cardboard so i plan on replacing them with mdf.  the inside is going to be painted creamy white and the outside with annie sloan paris grey.  i have removed the back of the piece and will replace that with beadboard.  it is in progress as we speak....
this lovely table.... 
a cute little duncan phyfe
is getting a makeover.
it  has cool brass caps for the feet that i thought were missing.
but one of them was still attached and two others (i have located a replacement for the fourth one online) were in a bag taped to these 
cool chairs that came with the table....4 of them....
they are very similar to three other chairs that i had found at the goodwill back in the summer
for $5.00 each...
here is the back story on the table and chairs...
last summer i redid a lot of furniture for my friend lisa.  she has since moved to minnesota
(i miss you girlfriend)
but her parents still live here.  she called me last week to tell me that her mom, penny,  had a table & chair set for me.  i thought that penny wanted me to make over the table for her but she had actually rescued the set from her brother who was going to burn it.  literally.  burn it in a fire pit.
she snatched it from him and delivered it to my house a few days ago...
for me to keep.  for free....free. 
thank you penny and walt... 
after she left i started inspecting it. 
the top is in pretty bad shape
 but it is really nice mahogany 
and all of the hardware is intact.  the sides raise and lower very easily.  
 and the legs and base are in really good and sturdy condition.
and it is hea-vy!!!
 i wondered if there was a leaf that went with it but penny said that her brother couldn't find it.  
but guess what????   
 a self-storing leaf......
(insert a long, high-pitched squeal here)
 obviously this leaf didn't get much use.  maybe no-one knew that it was there.  
 this little beauty is going to replace my current table and chairs in the kitchen.  it is a little less long and wide than my current set is and will fit better.  i think i'm going to refinish the top and paint the bottom.
the gouges and scratches on the top are pretty deep, so i'll see how that goes....
i'm really excited about it. 


the other project i am currently working on started out like this...


 and will be revealed in a few days....
stay tuned!!


Related Posts with Thumbnails